Make the best our of your m2 experience
Tutorial
1. Download Hunt2
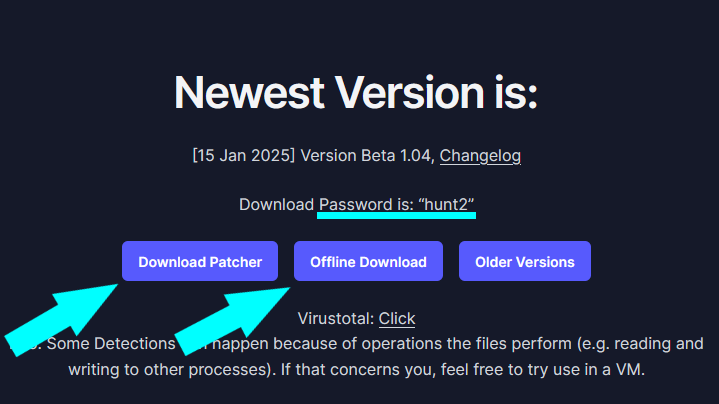
Go to: https://hunt2.net/download/
Download the Patcher. If you have problems using the Patcher, you can also use the Offline Download.
You need 7-Zip or WinRAR to open the files.
Right-click them and press “extract here”.
The Password is “hunt2”.
2. Start Hunt2 and Login
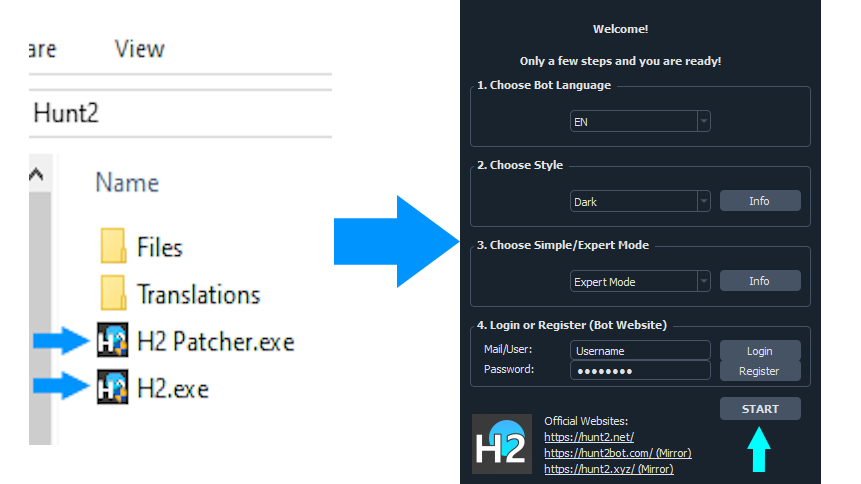
Start H2.exe or H2 Patcher.exe
You should now see multiple items. Folders “Files” and “Translations” and H2 Patcher.exe or H2.exe.
Start H2 Patcher.exe or H2.exe and you see the Window on the right. In the following window, select your language and enter your Hunt2 Account Data (not M2 Account) at the bottom. Then click “Login”.
If you don’t have an account yet, you can create one using the “Register” Button, or visit https://hunt2.net/register/.
4. Enter your M2 Account Data
Setup Hunt2 to be ready to start
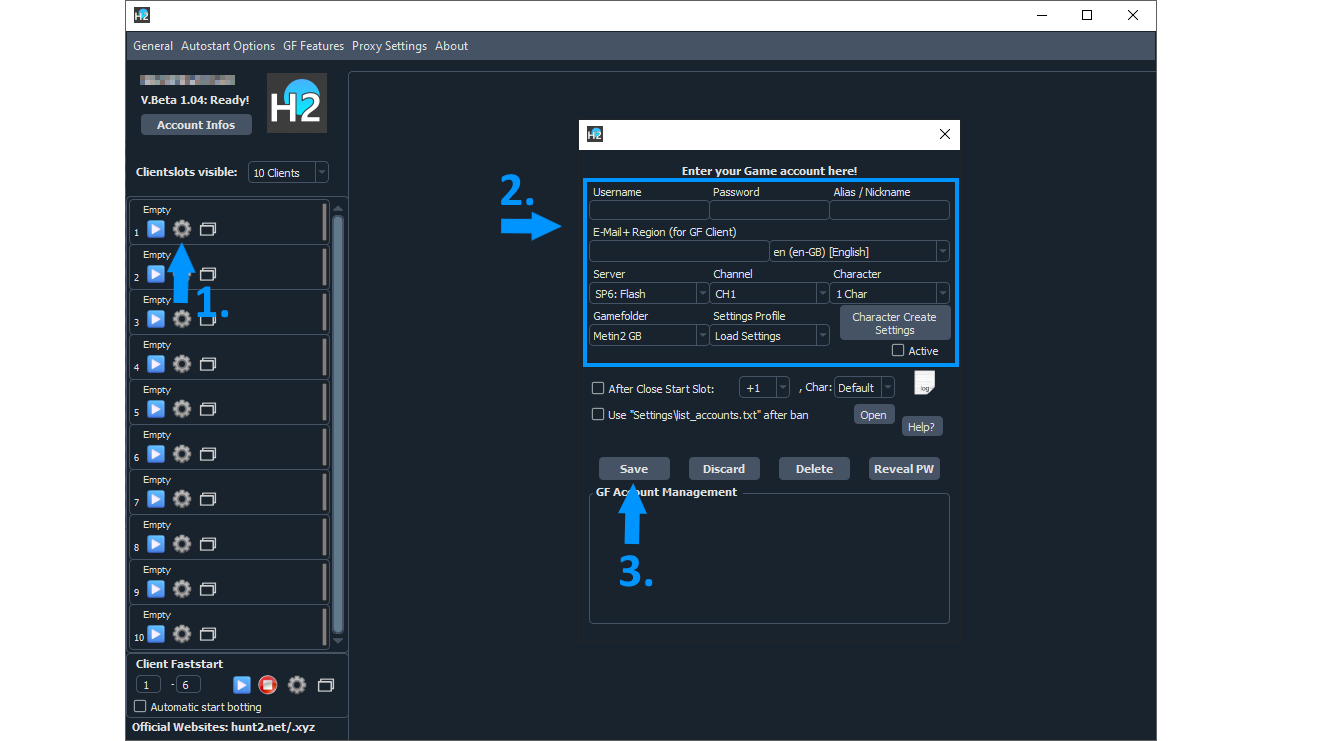
Click the Wheel in Order to get to the Account Data Window.
Here you need to enter your Metin2 Account Data. For GF Servers, you also need to fill out E-Mail and Region. Make sure to fill all fields, otherwise there will be Login Errors. After you are done, press “Save”.
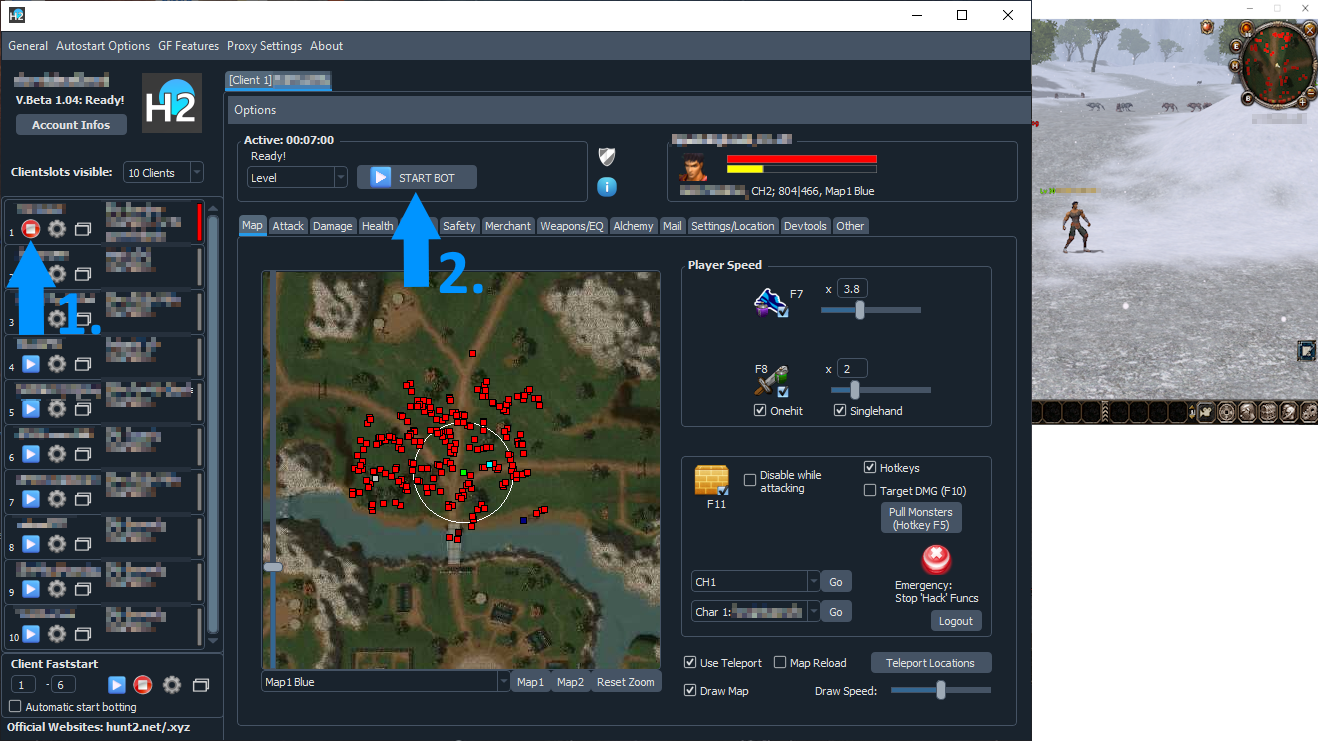
5. Start Hunt2 Client
Go ingame and load Hunt2 Client
Now click the “Play”-Button in the Launcher and the Hunt2 Client (left side) and the M2 Window should open. Here, just wait until Hunt2 tries todo an automatic Login (DO NOT TRY TO LOGIN MANUALLY in M2).
Afterwards, you should see the Ingame View and the Hunt2 Map should load. Now you can configure your settings and press “Start Bot”.
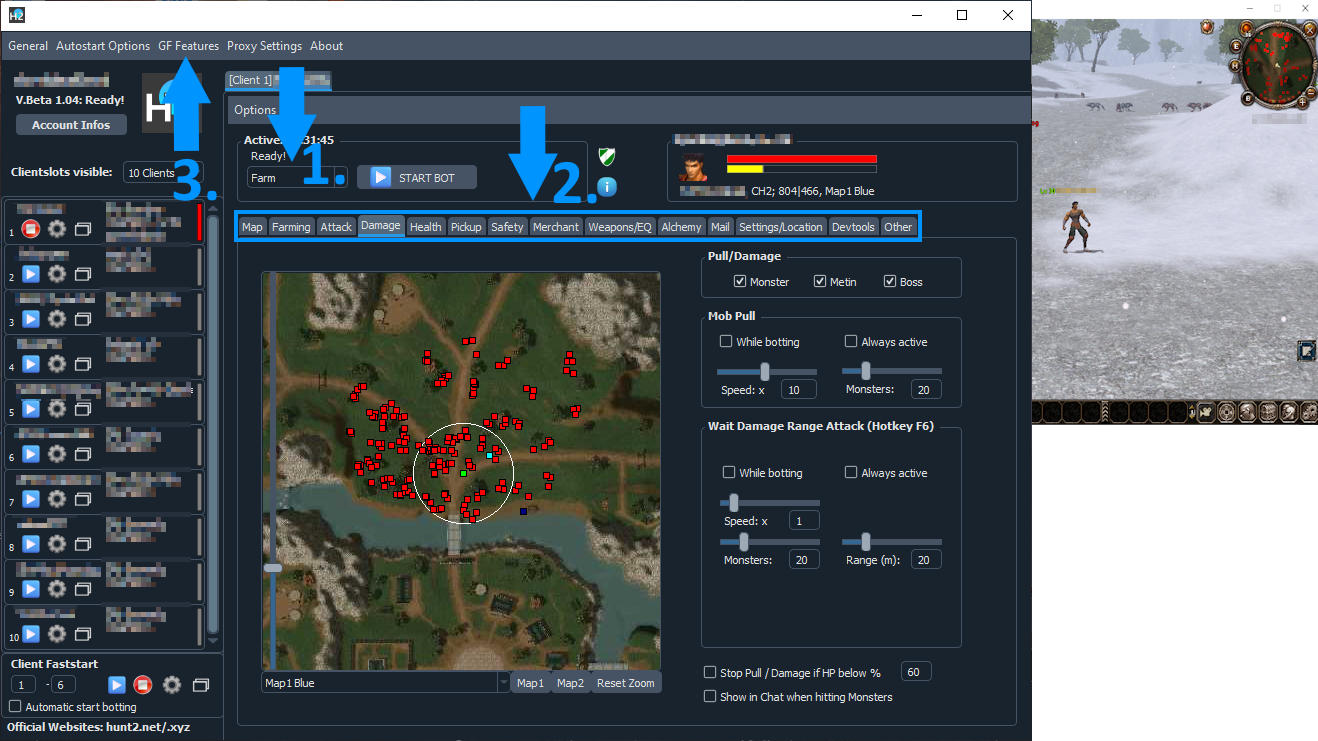
6. Enjoy Hunt2!
Configure your botting experience as you wish
In the Client Window, you can choose your Botmode[1] (Levelbot, Fishbot, etc.) and also select your Settings[2] (Attack, WaitDMG, Pickup). You can also configure The Login Options at the Top of the Launcher[3] (GF Autologin, GF Macro Login, Manual Login).
More Information about the features is available here and in the FAQ.


